We’ve all been there. You’re trying to find a solution to a problem, sifting through documentation, forums, or a queue of support tickets, and you know the answer is in there somewhere. The challenge isn’t a lack of information, but the difficulty of finding it when you don’t know the exact keywords. What if you could search based on meaning instead?
That’s the power of semantic search. Unfortunately, intelligent search involves quite some heavy computation. If not designed properly we can end up with an unresponsive and frustrating application. We’ll tackle this problem by creating a smart support ticket system that can automatically find similar, previously resolved issues, demonstrating a real-world application of this technology.
To do this, we’ll construct a powerful application by combining the native AI Vector Search in Oracle Database, the fast time-to-market that Spring Boot offers, and the simple, reliable background job processing of JobRunr. This guide will walk you through the entire process, from database setup to a fully functional semantic search implementation, all without compromising your application’s performance.
{
  "ticket": {
    "id": "9cb6fd48-9f8a-4523-b44f-a83388453148",
    "version": 1,
    "subject": "JobRunr is having troubles",
    "description": "When running a job, I encounter a JobNotFoundException",
    "createdAt": "2025-08-18T10:03:46.628538Z",
    "status": "OPEN",
    "resolution": null
  },
  "similarTickets": [
    {
      "id": "0a7dcc25-79b5-457a-878e-7a7e47e87b09",
      "subject": "JobRunr is not working in 2025",
      "description": "I have a JobNotFoundException",
      "resolution": "If you have a JobNotFoundException, it means you changed the signature of your job and it cannot be found anymore in your code.",
      "score": 0.7755735124522392
    }
  ]
}
The Challenge: Slow AI Makes Apps Unresponsive
Integrating AI features like vector search into an application presents a classic challenge: the process of generating vector embeddings for text can be computationally expensive. An embedding is essentially a numerical representation of data (in our case, the text of a support ticket), which allows us to measure similarity.
If you calculate these embeddings synchronously - that is, during the web request when a user submits or updates a ticket - the user is left waiting. This can lead to slow response times, request timeouts, and a frustrating user experience. The obvious solution is to offload this heavy lifting to a background process. This is where JobRunr comes in. JobRunr makes this simple and reliable. It’s fully distributed, developer-friendly, and comes with a powerful built-in dashboard so you can track, retry, and monitor jobs with ease.
Our Architecture: The Best of Three Worlds
Our application will use a robust stack to solve the problem:
- Oracle Database 23ai: At the core, we’ll use Oracle DB for its native
VECTORdata type and AI Vector Search capabilities. This lets us store text embeddings and efficiently query for the most similar ones directly in the database. - Spring Boot 3: This provides the foundation for our application, with a REST API for managing tickets. We’ll use Spring Data JDBC for easy database interaction.
- JobRunr: The key to keeping our app responsive. We’ll use JobRunr to enqueue a background job whenever a ticket is resolved. This job will handle generating and storing the vector embedding without the user ever noticing the work being done.
Here’s the flow of our smart ticket resolution application:
- A user submits a new ticket via a REST endpoint.
- A support engineer eventually resolves the ticket and adds a resolution.
- When the ticket is marked as “CLOSED,” our
TicketServiceenqueues a background job with JobRunr, passing it the ticket’s ID. - JobRunr picks up the job and, in the background, calls a method to generate a vector embedding and save it to the database.
- When a new ticket is viewed, we query the database to find the most similar closed tickets by comparing vector distances.
Step-by-Step Guide to Building a Responsive Ticket Resolution AI Powered App in Java
As Ronald demonstrated in the webinar with Oracle, the best way to tackle a project like this is iteratively. We’ll start with the simplest possible working application and gradually add layers of functionality. You can find the final source code for this demo in the GitHub repository.
Step 1: Project Initialization & Dependencies
We’ll start with a new Spring Boot project using Java 21. You can generate the project at start.spring.io, selecting the following dependencies:
- Spring Web
- Spring Data JDBC
- Oracle JDBC Driver
- Docker Compose Support
We want to stay with Oracle tools as much as possible, so we’ll also use Oracle Universal Connection Pool (UCP) to manage our connections to the database. UCP offers advanced features like fast connection failover and is designed for high availability in production setups.
To handle background job processing, we’ll add JobRunr to the project:
<dependency>
   <groupId>org.jobrunr</groupId>
   <artifactId>jobrunr-spring-boot-3-starter</artifactId>
   <version>8.0.2</version>
</dependency>
Once generated, you can open the project in your favorite IDE and you’re ready to continue.
Note: The Oracle JDBC driver is sometimes marked with
<scope>runtime</scope>by default. For compilation to work smoothly, you may need to remove that line so the driver is available at compile time too.
Step 2: Setting Up the Environment
Before we write any Java code, we need a running Oracle Database. Manually installing and configuring a database can be complex and time-consuming. To streamline this, we’ll use Docker. Docker will download the correct Oracle Database 23ai image, configure it, and even run our initial SQL scripts to create tables and load the AI model, all with a single command.
Step 2a: Prepare your Docker compose file
The heart of this automated setup is the compose.yaml file shown below. Pay close attention to the volumes section; this is the critical part that mounts our local directories into the container. It’s how we provide our custom SQL initialization scripts and the pre-trained AI model, making the entire database configuration self-contained.
services:
  oracle-ai:
    image: gvenzl/oracle-free:23.7-faststart
    container_name: oracle-ai
    ports:
      - "1521:1521"
    environment:
      ORACLE_PASSWORD: sys_user_password
      APP_USER: TEST
      APP_USER_PASSWORD: TEST
    healthcheck:
      test: [ "CMD", "healthcheck.sh" ]
      interval: 10s
      timeout: 5s
      retries: 10
      start_period: 5s
      start_interval: 5s
    volumes:
      - ./src/main/resources/model:/data/mining/model
      - ./src/main/resources/container-entrypoint-initdb.d:/container-entrypoint-initdb.d
    restart: unless-stopped
Step 2b: Copy the SQL scripts into the right folder.
The Oracle container image we’re using is designed to automatically execute any .sql files it finds in the /container-entrypoint-initdb.d directory upon startup. Thanks to the volume we mounted in our compose.yaml, we can simply place our setup scripts in the corresponding local folder, and the container will handle the rest.
Here’s a breakdown of the scripts we’ll use:
01_setup_oracle.sql&02_alter_redo_log.sql: These contain minor performance tweaks for the local development environment. While optional, they’re good practice.03_create_tickets_table.sql: This script creates ourTICKETStable. The most important part is theEMBEDDING VECTORcolumn, which is the special data type that will hold the AI-generated numerical representations of our tickets.04_load_model.sql: This script does two things: it grants the necessary database permissions to our application user and then uses theDBMS_VECTOR.LOAD_ONNX_MODELprocedure to load our pre-trainedall_MiniLM_L12_v2.onnxmodel directly into the database.
You can copy these scripts from the project’s GitHub repository and paste them into src/main/resources/container-entrypoint-initdb.d
Step 2c: Download the Pre-Trained AI Model
Our database needs a pre-trained language model to understand the meaning of the ticket text and convert it into a vector embedding. For this, we’ll use all-MiniLM-L12-v2, a popular and efficient model that is great for this kind of task.
You can download the all_MiniLM_L12_v2 model file directly from this link. Once downloaded, save it to the src/main/resources/model/ directory. This is the same folder we mapped to the Docker container in our compose.yaml file, making the model available for our setup script. If you want to read more about this, you can do so in this Oracle Blog post.
The model is provided in the ONNX (Open Neural Network Exchange) format. This is a standard format that allows models trained in frameworks like PyTorch or TensorFlow to be run on other platforms, in our case, directly inside Oracle Database. This is the file that our 04_load_model.sql script will load.
Step 2d: Copy all the helper classes
While Spring Data JDBC is powerful, it sometimes needs guidance on how to map specific Java types to corresponding database columns, especially with custom or non-standard data types like Oracle’s VECTOR. To solve this, we need to provide a few custom converter classes.
These converters act as translators:
BytesToUuidConverter&UuidToBytesConverter: These teach Spring how to convert between a JavaUUIDobject and theRAW(16)format that Oracle uses to store it.DoubleArrayToJdbcValueConverter: This is crucial for our project. It tells Spring how to handle the conversion between a Javadouble[]array and Oracle’s nativeVECTORdata type.DemoOracleAiJobRunrConfiguration: This is the glue that holds it all together. It’s a Spring@Configurationclass that registers all our custom converters, making them available to the application at startup.
You can find these helper classes in the project’s GitHub repository. Simply copy them into your own project’s support package.
We’ll also need to make sure that Spring uses these new converter classes so you also need to copy over the DemoOracleAiJobRunrConfiguration
Checkpoint!
It’s time to check if our docker-containers are working correctly. We’ll type
docker compose upin our terminal in Intellij.You’ll first see that all containers are downloading and when it finishes, it should look something like this.
Step 3: Creating the Core Domain Model
With our environment ready, it’s time to define the core of our application: the Ticket entity. This is a plain Java class that directly maps to the TICKETS table we created in our database.
Here is the complete code for Ticket.java. We’ll break down the important parts right after.
// src/main/java/org/jobrunr/demo/tickets/model/Ticket.java
package org.jobrunr.demo.tickets.model;

import org.springframework.data.annotation.Id;
import org.springframework.data.annotation.PersistenceCreator;
import org.springframework.data.annotation.Version;
import org.springframework.data.relational.core.mapping.Table;
import java.time.Instant;
import java.util.UUID;

@Table("TICKETS")
public class Ticket {

    @Id
    private final UUID id;
    @Version
    private final int version;
    private final String subject;
    private final String description;
    private final Instant createdAt;
    private TicketStatus status; // Not final, as it will be updated
    private String resolution;   // Not final, as it will be updated

    @PersistenceCreator
    protected Ticket(UUID id, int version, String subject, String description, Instant createdAt, TicketStatus status, String resolution) {
        this.id = id;
        this.version = version;
        this.subject = subject;
        this.description = description;
        this.createdAt = createdAt;
        this.status = status;
        this.resolution = resolution;
    }

    public static Ticket newTicket(String subject, String description) {
        return new Ticket(UUID.randomUUID(), 0, subject, description, Instant.now(), TicketStatus.OPEN, null);
    }

    public void close(String resolution) {
        this.status = TicketStatus.CLOSED;
        this.resolution = resolution;
    }

    // ... All Getters ...
}
Breaking Down the Ticket Entity
Let’s look at the key annotations and design choices in this class:
@Table("TICKETS"): This annotation explicitly maps ourTicketclass to theTICKETStable in the database.@Idand@Version: These are essential for Spring Data JDBC.
@Idmarks theidfield as the primary key, which Spring needs to uniquely identify each record.@Versionenables optimistic locking. Spring will automatically manage this field to prevent concurrent modification conflicts, which is a great feature to have out of the box.
@PersistenceCreator: This crucial annotation tells Spring Data JDBC, “Use this specific constructor when you are creating aTicketobject from data you’ve fetched from the database.”Why a Class and Not a Record?: You might notice that the
statusandresolutionfields are notfinal. This is a deliberate design choice. Since a ticket’s state changes over its lifecycle (fromOPENtoCLOSED), we need a mutable object. This is a classic scenario where a standard class is more appropriate than an immutable Javarecord.Factory Method (
newTicket): Thepublic static Ticket newTicket(...)method provides a clean, convenient way to create new ticket instances. It encapsulates the logic for setting default values like a newUUID, version0, and an initialOPENstatus.
Step 4: A Working Endpoint
With our domain model in place, let’s create the first functional part of our application: an API endpoint to list tickets. This involves two components: a TicketRepository to handle database operations and a TicketController to expose our REST API.
First, let’s create the TicketRepository. Thanks to Spring Data JDBC, we don’t have to write any SQL for simple queries. By extending CrudRepository, we instantly get methods like save(), findById(), and findAll(). Even better, we can define our own queries just by declaring a method with a specific name. By creating a method called findByStatus, Spring automatically generates the correct SQL to query tickets by their status.
// org/jobrunr/demo/tickets/TicketRepository.java
@Repository
public interface TicketRepository extends CrudRepository<Ticket, UUID> {
    // Spring Data JDBC automatically generates the query from this method name!
    List<Ticket> findByStatus(TicketStatus status);
}
Next, we’ll create the TicketController. This class uses @RestController to handle web requests. We’ll inject our TicketRepository and create a single GET endpoint that lists tickets, defaulting to OPEN tickets if no status is provided.
// org/jobrunr/demo/tickets/TicketController.java
@RestController
@RequestMapping("/tickets")
public class TicketController {

    private final TicketRepository ticketRepository;

    public TicketController(TicketRepository ticketRepository) {
        this.ticketRepository = ticketRepository;
    }

    @GetMapping("/")
    public List<Ticket> getTickets(@RequestParam(defaultValue = "OPEN") TicketStatus status) {
        return ticketRepository.findByStatus(status);
    }
}
Step 5: Configuring the Application
Now it’s time to connect all the pieces. We’ll do this in the application.properties file, which is the central place for configuring a Spring Boot application. This file tells our app how to connect to the database, how to configure the connection pool, and how to enable JobRunr’s features.
Here is the complete configuration. We’ll break down each section below.
spring.application.name=demo-oracle-ai-jobrunr

#Oracle Database - Connection Details
spring.datasource.url=jdbc:oracle:thin:@localhost:1521/FREEPDB1
spring.datasource.username=TEST
spring.datasource.password=TEST

#Oracle Universal Connection Pool (UCP) Properties
spring.datasource.type=oracle.ucp.jdbc.PoolDataSource
spring.datasource.oracleucp.connection-factory-class-name=oracle.jdbc.datasource.impl.OracleDataSource
spring.datasource.oracleucp.connection-pool-name=DEFAULT_POOL
spring.datasource.oracleucp.connection-properties.oracle.jdbc.vectorDefaultGetObjectType=double[]
spring.datasource.oracleucp.initial-pool-size=4
spring.datasource.oracleucp.min-pool-size=4
spring.datasource.oracleucp.max-pool-size=4

jobrunr.dashboard.enabled=true
jobrunr.background-job-server.enabled=true
Configuration Breakdown
Oracle Database - Connection Details: These are the standard Spring Data properties. We provide the JDBC URL, username, and password that our application will use to connect to the Oracle database running in our Docker container.
Oracle Universal Connection Pool (UCP) Properties: This block activates and configures the high-performance UCP we added earlier.
spring.datasource.type: This is the key property that tells Spring Boot to use Oracle’s UCP instead of the default connection pool.vectorDefaultGetObjectType=double[]: This is a crucial setting for our vector search. It instructs the Oracle JDBC driver to automatically map the database’s nativeVECTORtype to a Javadouble[]array, which saves us from writing complex manual conversion logic.
JobRunr Configuration: These two lines bring JobRunr to life.
jobrunr.dashboard.enabled=true: This enables the web dashboard, which is an invaluable tool for monitoring and debugging your background jobs. You’ll be able to access it athttp://localhost:8000/dashboard.jobrunr.background-job-server.enabled=true: This is what actually starts the background processing. Without this set totrue, jobs would be enqueued but would never be executed.
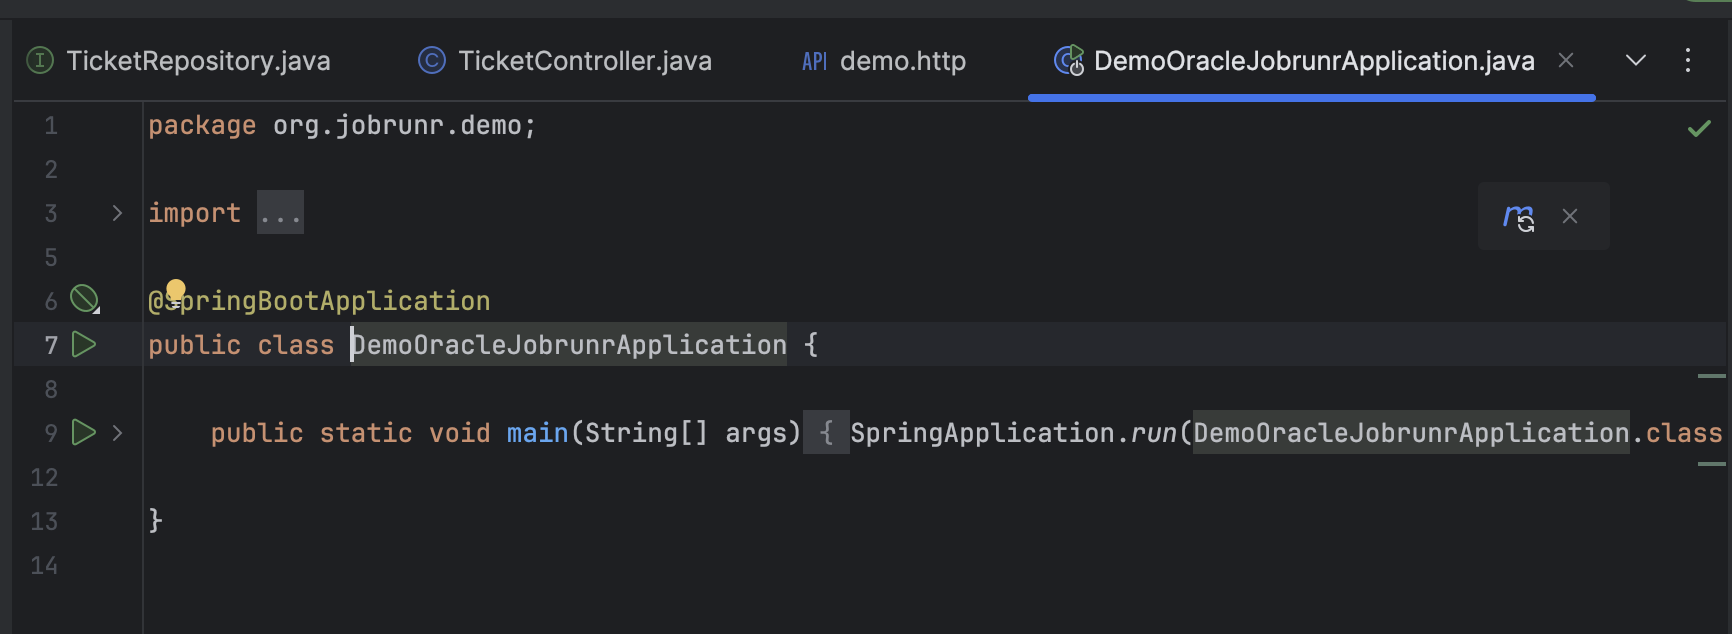
Checkpoint: Run the application now by launching the main method in the DemoOracleJobrunrApplication class.
It should start successfully. If you make a
GETrequest to/tickets, you’ll receive an empty[]. This confirms our database connection and type converters are working correctly.
Step 6: Creating and saving a new Ticket
Before we can resolve tickets and generate embeddings, users need a way to create them. Let’s add a POST endpoint to our existing TicketController to handle new ticket submissions.
@PostMapping ("/")
public ResponseEntity<Ticket> submitTickets(@RequestParam() String subject, @RequestParam() String description){
   Ticket ticket = Ticket.newTicket(subject, description);
   ticketRepository.save(ticket);
   return ResponseEntity.ok(ticket);
}
This method takes the subject and description from the request, uses our newTicket factory method to create an instance, saves it to the database, and returns the newly created ticket. Wrapping the result in a ResponseEntity gives us full control over the HTTP response, ensuring the client receives a standard 200 OK status code on success.
Step 7: Adding Logic to Close a Ticket
So far, our controller has been directly interacting with the repository. As our application grows, it’s common to introduce a service layer to hold our business logic. Let’s create a TicketService to handle the process of closing a ticket.
First, create the TicketService class. Its closeTicket method will find the ticket, call the close() method we already defined on our entity, and save the updated ticket back to the database.
// src/main/java/org/jobrunr/demo/tickets/TicketService.java
@Service
public class TicketService {
    private final TicketRepository ticketRepository;

    public TicketService(TicketRepository ticketRepository) {
        this.ticketRepository = ticketRepository;
    }

    public Ticket closeTicket(UUID ticketId, String resolution) {
        // 1. Find the ticket or throw an exception if it doesn't exist.
        Ticket ticket = ticketRepository.findById(ticketId)
                .orElseThrow(() -> new TicketNotFoundException(ticketId));

        // 2. Update its state using the method on the entity.
        ticket.close(resolution);
        //TODO: Calculate the embedding when the ticket is resolved

        // 3. Save the changes back to the database.
        return ticketRepository.save(ticket);
    }
}
Next, let’s add the corresponding endpoint to our TicketController. We’ll inject the new TicketService and use it to handle the request.
// Add this to your TicketController.java

// Don't forget to inject the TicketService in the constructor!
private final TicketService ticketService;

@PostMapping("/{id}/resolve")
public ResponseEntity<Ticket> resolveTicket(@PathVariable UUID id, @RequestParam String resolution) {
    Ticket ticket = ticketService.closeTicket(id, resolution);
    return ResponseEntity.ok(ticket);
}
A Teachable Moment from the Live Demo! During the original webinar, a bug appeared where resolving a ticket seemed to work, but the changes weren’t saved. The reason was simple: the
ticketRepository.save(ticket)line was missing. It’s a common mistake to modify an entity in memory but forget to persist the changes. Always remember to save your entity after you update it!
And now the fun stuff! We’ll start with creating the embeddings
Step 8: Creating and storing embeddings
This is where JobRunr enters the picture. The process of calculating a vector embedding can be time-consuming. To prevent our API from becoming slow and unresponsive, we’ll offload this work to a background job. When a ticket is resolved, our API will return a response immediately, while JobRunr handles the AI processing behind the scenes.
1. Add the Database Queries
First, we need to give our TicketRepository the ability to interact with the database’s vector capabilities. Add the following two methods to your TicketRepository interface:
// TicketRepository.java

// Calls the ONNX language model (ALL_MINILM_L12_V2) that was previously loaded into Oracle,
// passing the given text to generate its vector embedding directly inside the database.

@Query("SELECT VECTOR_EMBEDDING(ALL_MINILM_L12_V2 USING :text AS DATA) AS EMB FROM DUAL")
Object computeEmbedding(@Param("text") String text);

// Updates the EMBEDDING column for the specified ticket ID with the provided vector,
// allowing future similarity searches to use the updated representation.
@Modifying
@Query("UPDATE TICKETS SET EMBEDDING = :vector WHERE ID = :ticketId")
void updateEmbedding(@Param("ticketId") UUID ticketId, @Param("vector") double[] vector);
2. Update the TicketService to Use JobRunr
Next, we’ll modify the TicketService. We’ll inject JobRunr’s JobScheduler, use it to enqueue a background job when a ticket is closed, and create the method that will be executed in the background.
// Update TicketService.java
@Service
public class TicketService {
    private final TicketRepository ticketRepository;
    private final JobScheduler jobScheduler; // 1. Inject JobRunr's JobScheduler

    // 2. Update the constructor to accept the JobScheduler
    public TicketService(TicketRepository ticketRepository, JobScheduler jobScheduler) {
        this.ticketRepository = ticketRepository;
        this.jobScheduler = jobScheduler;
    }

    public Ticket closeTicket(UUID ticketId, String resolution) {
        Ticket ticket = ticketRepository.findById(ticketId).orElseThrow();
        ticket.close(resolution);
        ticketRepository.save(ticket);

        // 3. This is the key! We enqueue a background job and return immediately.
        jobScheduler.enqueue(() -> computeAndStoreEmbedding(ticketId));

        return ticket;
    }

    // 4. This method will be executed by JobRunr in the background.
    @Job(name = "Compute and store embedding for ticket %0")
    public void computeAndStoreEmbedding(UUID ticketId) {
        Ticket ticket = ticketRepository.findById(ticketId).orElseThrow();
        String content = ticket.getSubject() + "\n" + ticket.getDescription();

        double[] embedding = (double[]) ticketRepository.computeEmbedding(content);
        ticketRepository.updateEmbedding(ticketId, embedding);
    }

    // ... other methods
}
Understanding the Details
You might notice we have to cast the result of computeEmbedding to a double[]. This works because of two configurations we set up earlier.
First, the spring.datasource.oracleucp.connection-properties.oracle.jdbc.vectorDefaultGetObjectType=double[] property in application.properties tells the Oracle driver to return vectors as double[].
Second, our custom DoubleArrayToJdbcValueConverter takes care of converting those arrays when saving the embedding back to the database.
Best Practice for JobRunr: Pass IDs, Not Objects: In the
enqueuecall, we pass theticketId(aUUID) instead of the entireTicketobject. This is a critical best practice. JobRunr serializes job arguments to JSON. Passing a small ID keeps the job payload minimal and prevents bloating the database tables that JobRunr uses for storage. The background job can then use the ID to fetch the full, up-to-date entity itself.
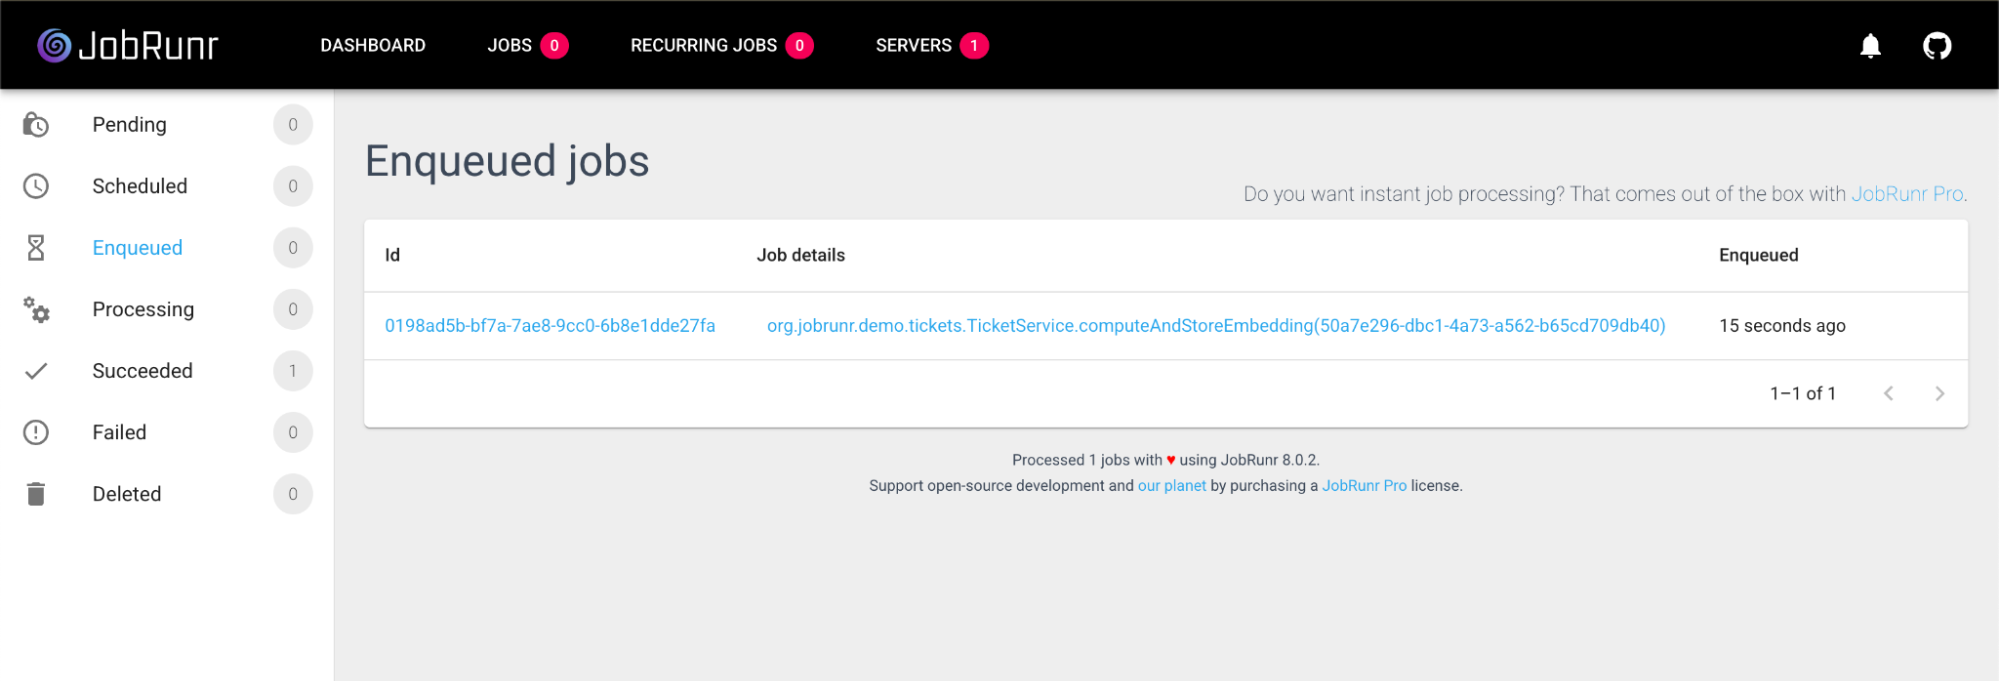
Checkpoint: Run the app and resolve a ticket. The API response will be immediate. Now, navigate to the JobRunr dashboard at http://localhost:80OO/dashboard. You can watch your job get processed and succeed!
And after a couple of seconds, your job should look like this: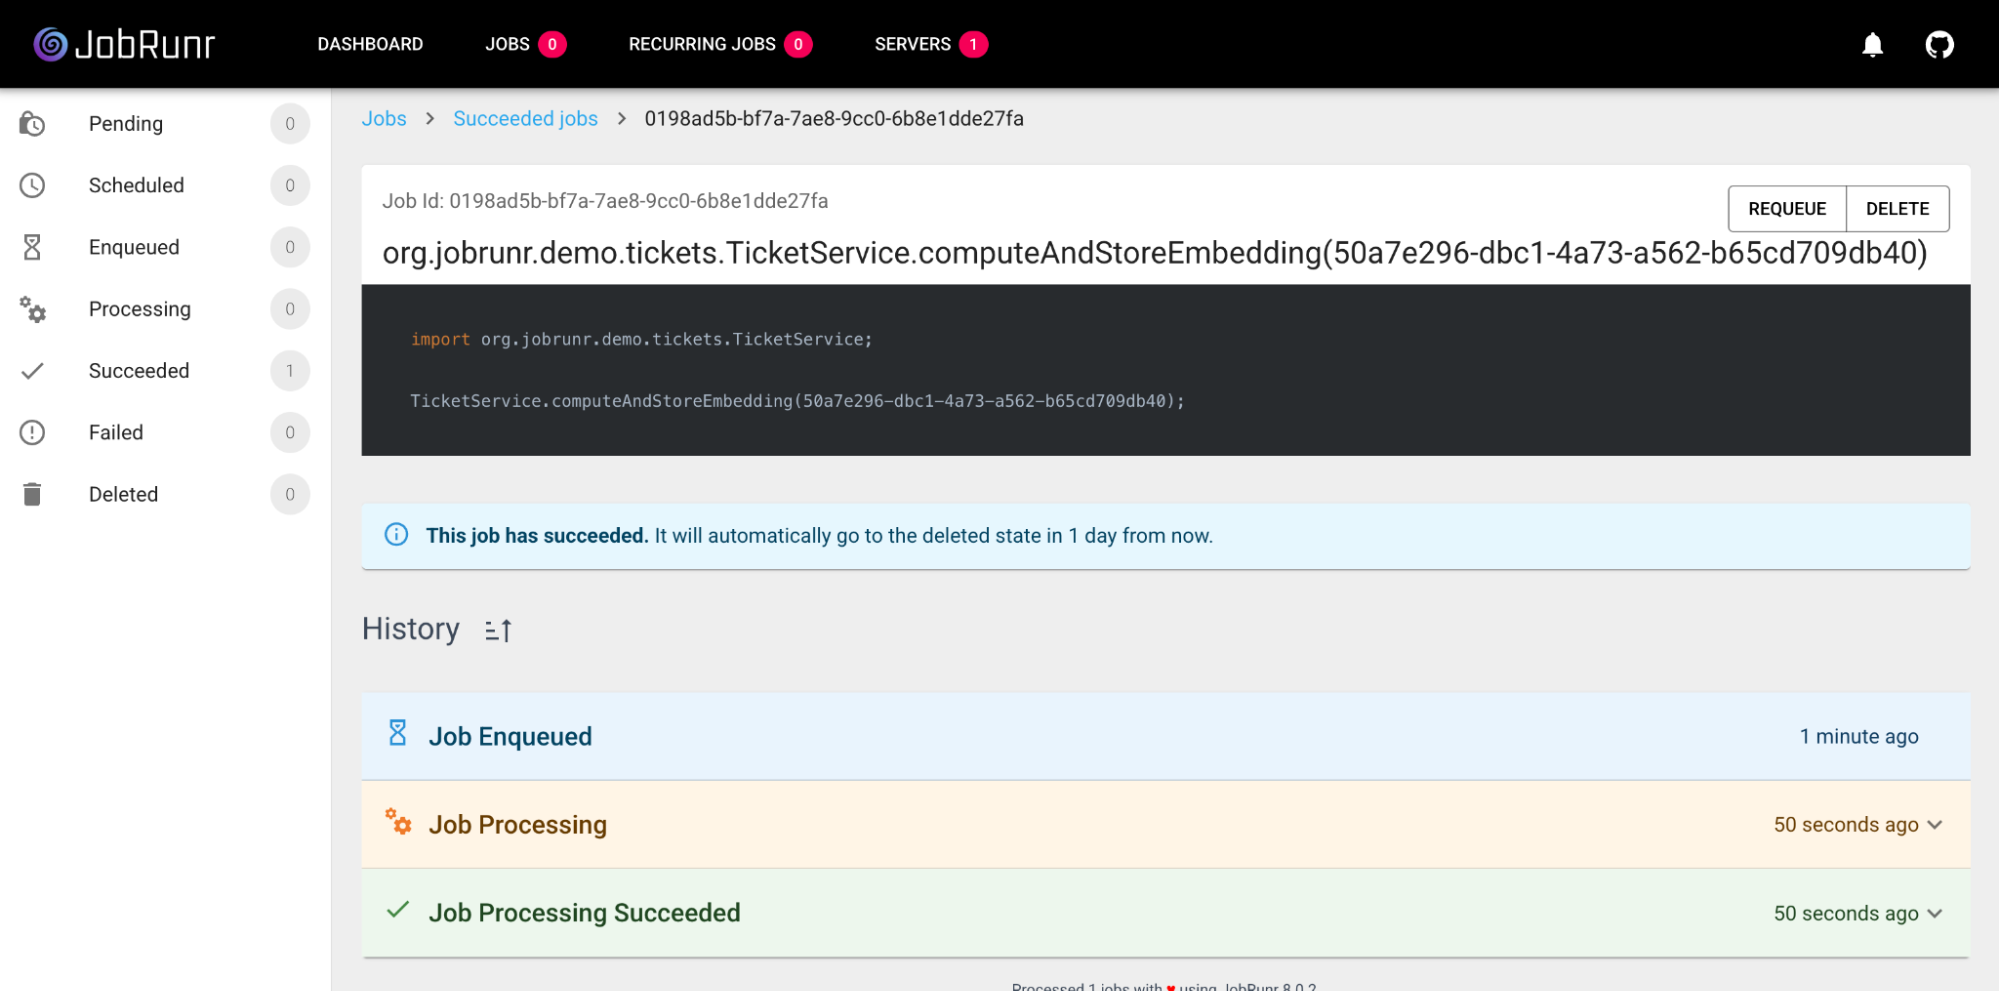
Step 9: The Payoff! Finding Similar Tickets
We’ve done the hard work. Now for the fun part: using our stored embeddings to find similar tickets. We’ll create a final GET /{id} endpoint that retrieves a single ticket and also returns a list of the most similar resolved tickets.
1. Define the Data Structures
First, we need to define how our results will look. Instead of returning the full Ticket object for every similar match, we’ll create two lightweight Java records:
SimilarTicketResult: A projection that holds just the essential data for a similar ticket: its ID, subject, resolution, and the similarity score.TicketView: A container that holds the main ticket being viewed and the list ofSimilarTicketResults.
// Create this record, e.g., in your model package
public record SimilarTicketResult(
    UUID id,
    String subject,
    String description,
    String resolution,
    double score
) {}

// Create this record as well
public record TicketView(Ticket ticket, List<SimilarTicketResult> similarTickets) {}
Using Java records here is perfect because they are immutable and concise, ideal for data transfer objects.
2. Add the Vector Search Query to the Repository
Next, add the final query to your TicketRepository. This is where the magic of Oracle’s AI Vector Search shines. The VECTOR_DISTANCE function calculates the cosine distance between the vector of our current ticket and the vectors of all previously resolved tickets. We convert this distance to a similarity score and grab the top 10 matches.
// Add to TicketRepository.java

// We are calculating the vector distance se we can retrieve the top K most similar closed tickets by comparing the given vector
//  to the stored EMBEDDING column using cosine similarity. The SCORE is calculated as
// (1 - cosine distance), so higher values mean greater similarity.
@Query("""
        SELECT ID, SUBJECT, DESCRIPTION, RESOLUTION, (1 - VECTOR_DISTANCE(EMBEDDING, :vector, COSINE)) AS SCORE
        FROM TICKETS
        WHERE STATUS = 'CLOSED'
        ORDER BY SCORE DESC
        FETCH FIRST :topK ROWS ONLY
        """)
    List<SimilarTicketResult> findTopKByEmbedding(@Param("vector") double[] vector, @Param("topK") int topK);
3. Implement the Service and Controller Logic
Finally, let’s wire everything together. We’ll add a getTicket method to our TicketService to orchestrate the search and a corresponding endpoint in the TicketController.
// Add to TicketService.java
public TicketView getTicket(UUID id) {
        Ticket ticket = ticketRepository.findById(id).orElseThrow();

        //Calculate the embedding of the new unresolved ticket, we only store embeddings of resolved tickets in our database
        double[] embedding = (double[]) ticketRepository.computeEmbedding(getContent(ticket));

        // Return the 10 most similar resolved tickets
        List<SimilarTicketResult> topKByEmbedding = ticketRepository.findTopKByEmbedding(embedding, 10);
        return new TicketView(ticket,topKByEmbedding);
    }
We are almost there! We just need to add an endpoint to retrieve 1 single ticket which will call our getTicket method.
This GetMapping can be something very simple such as
// Add to TicketController.java
@GetMapping("/{id}")
    public ResponseEntity<TicketView> getTicket(@PathVariable UUID id) {
        TicketView ticket = ticketService.getTicket(id);
        return ResponseEntity.ok(ticket);
    }
Final Test:
Let’s put it all to the test with a real-world scenario:
- Create ticket A:
POST /ticketswith the subject “My JobRunr job is not working.” - Resolve ticket A:
POST /tickets/{id_A}/resolvewith the resolution “The job signature changed.” - Create a similar ticket B:
POST /ticketswith the subject “I have a problem where my job is not being found.” - View ticket B:
GET /tickets/{id_B}.
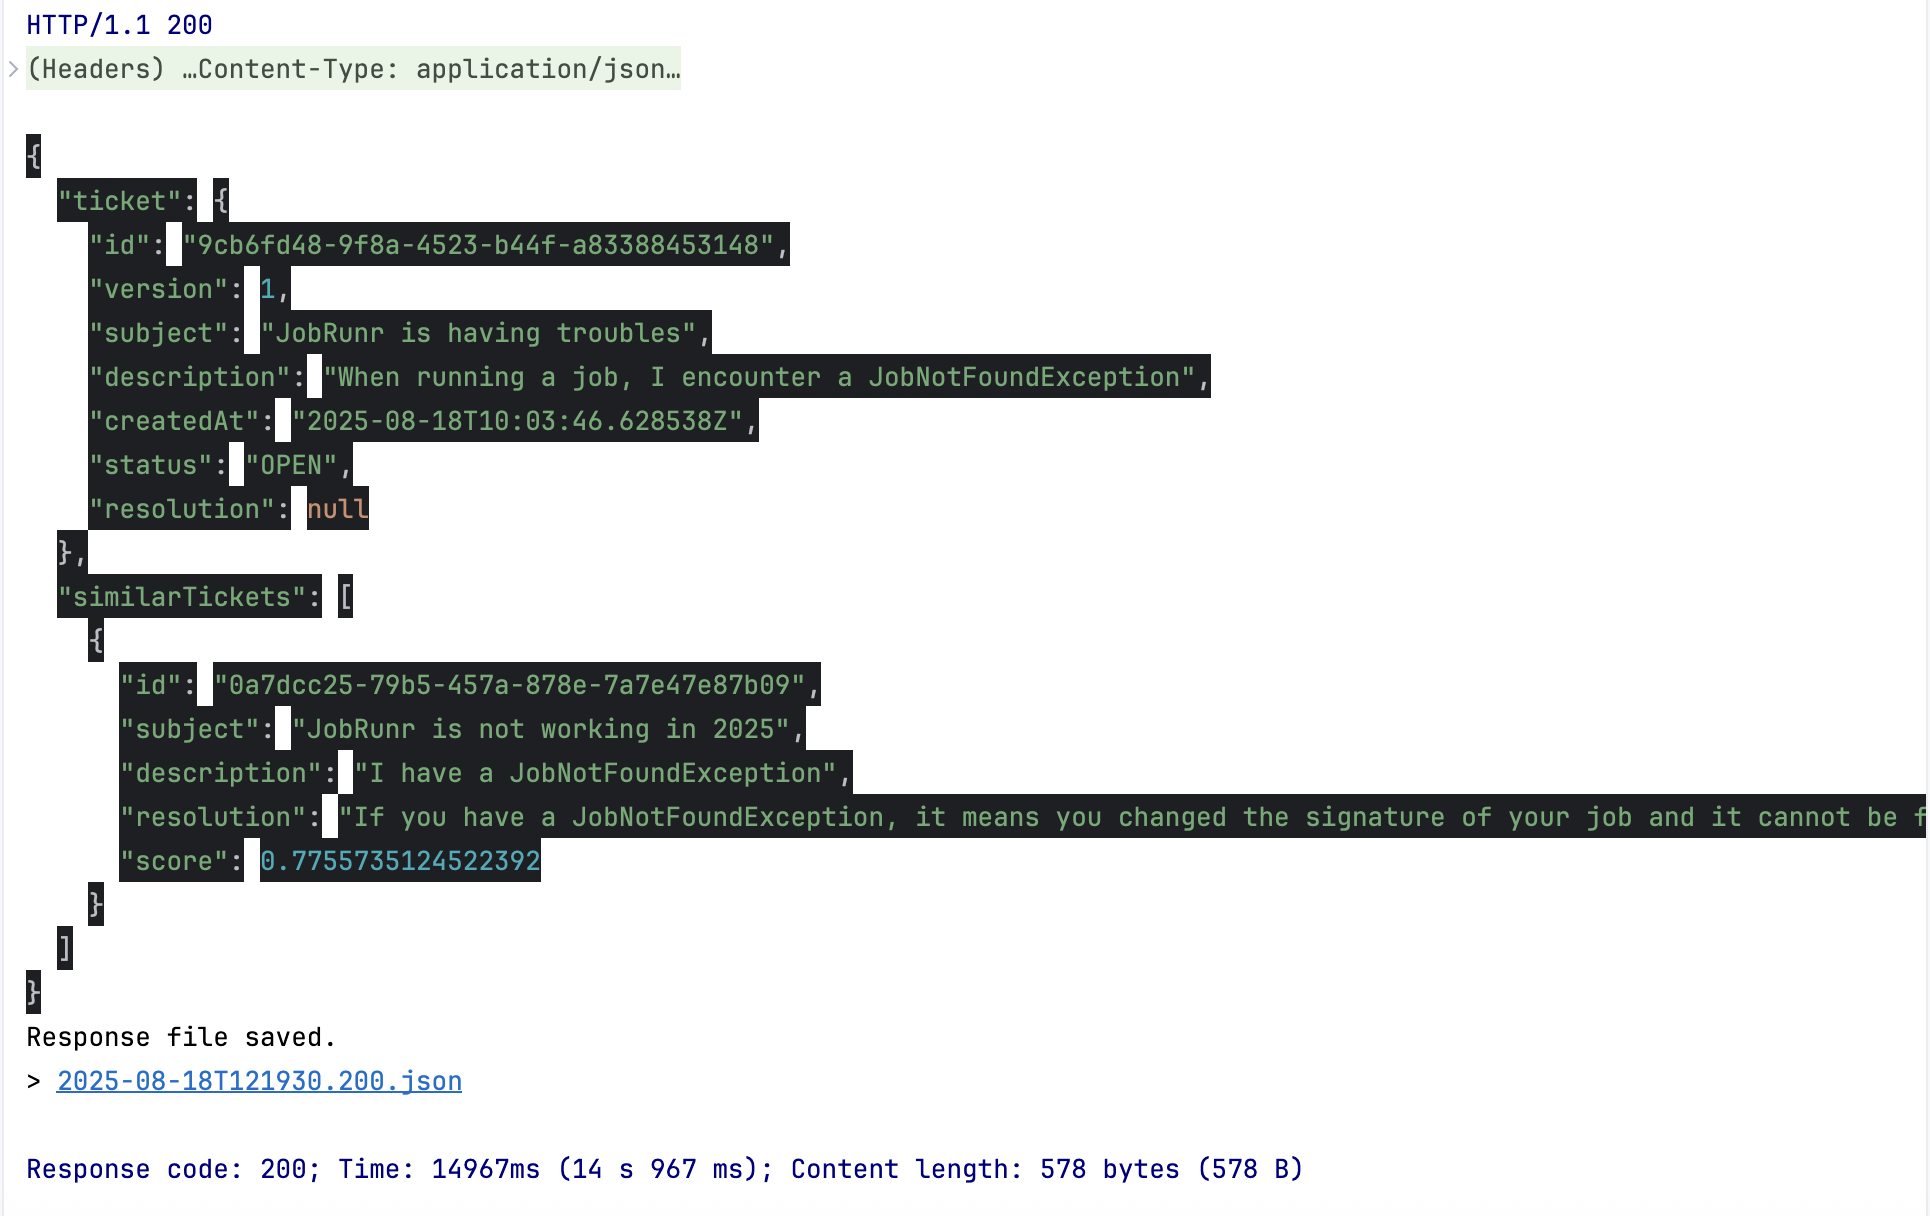
In the response, you should see ticket A listed in the similarTickets array with a very high similarity score. Success! 🥳
Troubleshooting Tip: No Similar Tickets Found? A common issue discovered during the live demo occurs if you try to find similar tickets but the background job to create the embeddings hasn’t run. This can happen if you forget to enable the background server in application.properties (jobrunr.background-job-server.enabled=true).
Without the embeddings in the database, the VECTOR_DISTANCE function has nothing to compare against and may return errors or empty results. Keep an eye on the JobRunr dashboard to ensure your embedding jobs are succeeding!
And there you have it! By following this guide, you’ve successfully built a powerful semantic search engine from the ground up. You’ve seen how to combine the strengths of Oracle’s native Vector Search, the agility of Spring Boot, and the asynchronous power of JobRunr to create a responsive, intelligent application.
This pattern of offloading complex, long-running tasks to background jobs is incredibly versatile. We encourage you to explore the full source code in the GitHub repository, experiment with the JobRunr dashboard, and think about how you can apply this blueprint to other challenges in your own projects.
Happy coding!

