
In this new tutorial, we will build further upon on our first tutorial - Easily process long-running jobs with JobRunr and deploy the JobRunr application to a Kubernetes cluster on the Google Cloud Platform (GCP) using Terraform. We then scale it up to 10 instances to have a whopping 869% speed increase compared to only one instance!
This tutorial is a beginners guide on the topic cloud infrastructure management - feel free to skip to the parts that interest you.
Kubernetes - also known as k8s - is the hot new devops tool for deploying high-available applications. Today, there are a lot of providers all supporting kubernetes including the well known Google Kubernetes Engine (GKE), Azure Kubernetes Service (AKS) and Amazon Elastic Kubernetes Service (EKS).
Although the world is currently in difficult times because of COVID-19, Acme Corp (see the first tutorial) hired so many people that there are now about 10.000 employees working for them. Acme Corp’s CEO insists that all employees get their weekly salary slip before Sunday 11pm but this has now become impossible - the amount of time it takes for generating that many salary slips is just too long.
Luckily JobRunr is here to help as it is a distributed background job processing framework. In this tutorial we will:
- create a Docker image from our SalarySlipMicroservice JobRunr application using Jib by Google
- upload the Docker image to a private Docker registry at Google
- use Terraform to define our infrastructure as code which includes a Google Cloud Sql instance.
- deploy a Kubernetes cluster using Terraform to Google Cloud
- deploy one instance of the SalarySlipMicroservice JobRunr Docker image to the Kubernetes cluster
- start generating all the employee slips
- scale to 10 instances of the SalarySlipMicroservice JobRunr application and all of this without any change to our production java code!
TLDR; you can find the complete project on our Github repository: https://github.com/jobrunr/example-salary-slip/tree/kubernetes
Postgres as database
In the first version of our application, we used an embedded H2 Database. As we now go for a deployment on Google Cloud Platform (GCP), we will use a Cloud Sql Postgres instance. To do so, we need to change our DataSource in the SalarySlipMicroService as follows:
@Bean
public DataSource dataSource() {
    HikariConfig config = new HikariConfig();
    config.setJdbcUrl(String.format("jdbc:postgresql:///%s", System.getenv("DB_NAME")));
    config.setUsername(System.getenv("DB_USER"));
    config.setPassword(System.getenv("DB_PASS"));
    config.addDataSourceProperty("socketFactory", "com.google.cloud.sql.postgres.SocketFactory");
    config.addDataSourceProperty("cloudSqlInstance", System.getenv("CLOUD_SQL_INSTANCE"));
    return new HikariDataSource(config);
}
Dockerize it!
Since Kubernetes runs Pods - which are in fact one or more Docker Containers - we first need to create a Docker Image from our application. Jib is a tool from Google to easily create Docker images from your Java application using only Maven or Gradle.
In our build.gradle file we add the following plugin:
plugins {
    ...
    id 'com.google.cloud.tools.jib' version '2.2.0'
}

...

jib {
    from {
        image = "gcr.io/distroless/java:11"
    }
    to {
        image = "gcr.io/jobrunr-tutorial-kubernetes/jobrunr-${project.name}:1.0"
    }
    container {
        jvmFlags = ["-Duser.timezone=Europe/Brussels"]
        ports = ["8000", "8080"]
    }
}
gcr.io/jobrunr-tutorial-kubernetes/jobrunr-${project.name}:1.0 so that it will be available later in GCP, specify the timezone and tell it to expose some ports.If we now run the gradle command: ./gradlew jibDockerBuild it will create a new Docker image for us, ready to run on Docker!
Install necessary tools
We now need to install all the necessary tools and create a Google Cloud account:
- Google Cloud SDK: Google Cloud SDK is a set of tools that you can use to manage resources and applications hosted on Google Cloud Platform.
- Kubectl: Kubectl is a command line tool for controlling Kubernetes clusters.
- Terraform: Terraform is an open-source infrastructure as code software tool created by HashiCorp. It enables users to define and provision a datacenter infrastructure using a high-level configuration language known as Hashicorp Configuration Language.
The installation for these tools is well explained and differs for each OS. Follow the installation guide for them and come back to the tutorial once you have done so.
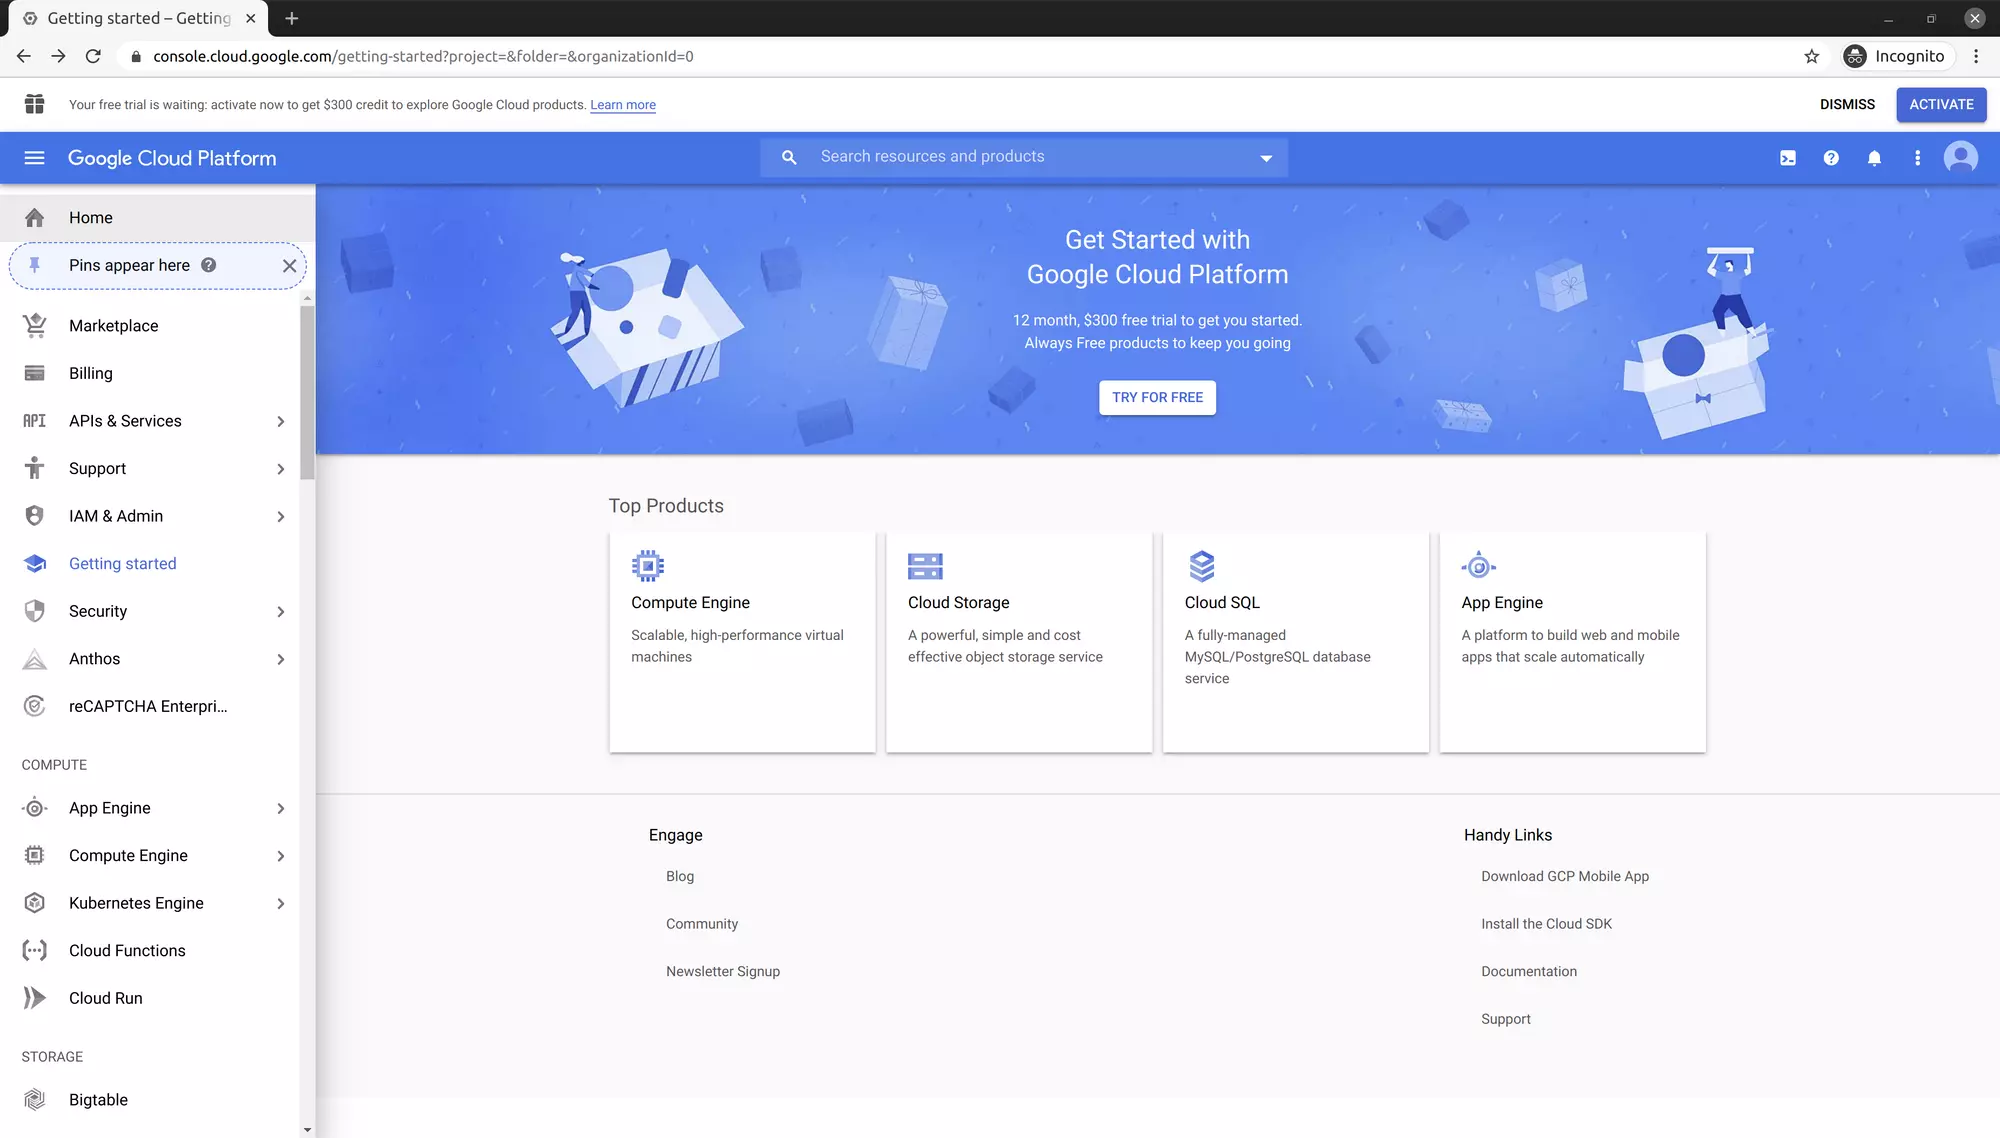
We also need an account for Google Cloud. Using your browser navigate to https://console.cloud.google.com/ - when you first login to the Google Cloud Platform you get 300 € of free credit, more than enough for us. You can activate it on the top right.
Create the GCP Project
In this tutorial, we will use the terminal as much as possible - so fire up a terminal and login to gcloud using the command: ~$ gcloud auth login - this will allow you to login only once for all future gcloud commands.
To deploy a Kubernetes cluster to GCP, we first need to create a new GCP project, add a billing account to it, enable the container API’s and upload our docker image:
~$ gcloud projects create jobrunr-tutorial-kubernetes --name="JobRunr K8s Tutorial" --set-as-default
~$ gcloud beta billing accounts list
~$ gcloud beta billing projects link jobrunr-tutorial-kubernetes --billing-account ${accountId}
~$ gcloud services enable container.googleapis.com
~$ gcloud services enable sqladmin.googleapis.com
~$ docker push gcr.io/jobrunr-tutorial-kubernetes/jobrunr-example-paycheck:1.0
We also need a Terraform service account with the necessary rights to create the Kubernetes cluster in the GCP project.
~$ gcloud iam service-accounts create terraform --display-name "Terraform admin account"
~$ gcloud projects add-iam-policy-binding jobrunr-tutorial-kubernetes --member='serviceAccount:terraform@jobrunr-tutorial-kubernetes.iam.gserviceaccount.com' --role='roles/editor'
~$ gcloud projects add-iam-policy-binding jobrunr-tutorial-kubernetes --member='serviceAccount:terraform@jobrunr-tutorial-kubernetes.iam.gserviceaccount.com' --role='roles/resourcemanager.projectIamAdmin'
~$ gcloud projects add-iam-policy-binding jobrunr-tutorial-kubernetes --member='serviceAccount:terraform@jobrunr-tutorial-kubernetes.iam.gserviceaccount.com' --role='roles/cloudsql.client'
~$ gcloud iam service-accounts keys create ~/.config/gcloud/jobrunr-tutorial-kubernetes-terraform-admin.json --iam-account=terraform@jobrunr-tutorial-kubernetes.iam.gserviceaccount.com
~$ export TF_CREDS=~/.config/gcloud/jobrunr-tutorial-kubernetes-terraform-admin.json
~$ export GOOGLE_APPLICATION_CREDENTIALS=${TF_CREDS}
Terraform deep dive
Now we’re all setup, we can start defining our infrastructure as code using Terraform.
In Terraform, several concepts exists:
- providers: a provider is responsible for understanding API interactions and exposing resources. Providers generally are an IaaS (e.g. AWS, GCP, Microsoft Azure, OpenStack), PaaS (e.g. Heroku), or SaaS services
- resources: resources are the most important element in the Terraform language. Each resource block describes one or more infrastructure objects, such as virtual networks, compute instances, … .
- variables: a variable can have a default value. if you omit the default value, Terraform will ask you to provide it when running a terraform command.
- modules: a module is nothing more than a folder which combines related terraform files.
- outputs: sometimes a variable is needed which is only known after terraform has done a change on a cloud provider - think of ip-addresses that are given to your application. An output takes that value and exposes it to your variables.
- …
In Terraform, you can organize your code the anyway you like it - Terraform itself figures out how to deploy it. In this tutorial, we will use two modules:
- gke module: this module is responsible for setting up a Kubernetes Cluster and a Postgres CloudSql instance.
- k8s module: this module will deploy our application to the Kubernetes Cluster and expose it to the internet via a service.
Our entrypoint in Terraform is the main.tf configuration file. Next to it, are two directories: gke and k8s. The final directory layout is as follows:
- gke
- variables.tf
- gcp.tf
- cluster.tf
- cloudsql.tf
- k8s
- variables.tf
- k8s.tf
- deployments.tf
- services.tf
- main.tf
Entrypoint for Terraform - main.tf
main.tf is the entrypoint in our infrastructure as code.
#####################################################################
# Variables
#####################################################################
variable "project" {
  default = "jobrunr-tutorial-kubernetes"
}
variable "region" {
  default = "europe-west1"
}
variable "username" {
  default = "admin"
}
variable "password" {
  default = "cluster-password-change-me"
}

#####################################################################
# Modules
#####################################################################
module "gke" {
  source = "./gke"
  project = var.project
  region = var.region
  username = var.username
  password = var.password
}

module "k8s" {
  source = "./k8s"
  host = module.gke.host
  username = var.username
  password = var.password

  client_certificate = module.gke.client_certificate
  client_key = module.gke.client_key
  cluster_ca_certificate = module.gke.cluster_ca_certificate
  cloudsql_instance = module.gke.cloudsql_db_instance
  cloudsql_db_name = module.gke.cloudsql_db_name
  cloudsql_db_user = module.gke.cloudsql_db_user
  cloudsql_db_password = module.gke.cloudsql_db_password
}
main.tf: in this file the GCP project that was created earlier on is reused. Other variables are also defined - like the region where the application will run and a username and password for the Kubernetes cluster. Next, two modules are defined which consume the variables. The k8s module reuses outputs from the gke module.GKE module
Our GKE module will create a container cluster on Google Cloud and provision a Postgres Cloud Sql instance. We start by defining some variables that can then be used in the other Terraform files.
#####################################################################
# GKE Variables
#####################################################################
variable "project" {}
variable "region" {}
variable "username" {}
variable "password" {}
gke/variables.tf: this file defines all the variables that are needed for the Kubernetes engine in Google Cloud. The values for the variables itself are provided in the main.tf file.
#####################################################################
# GKE Provider
#####################################################################
provider "google" {
  project = var.project
  region  = var.region
}
gke/gcp.tf: the google provider allows to create a container cluster and a Postgres Cloud Sql instance#####################################################################
# GKE Cluster
#####################################################################
resource "google_container_cluster" "jobrunr-tutorial-kubernetes" {
name = "jobrunr-tutorial-kubernetes"
location = var.region
initial_node_count = 1
master_auth {
username = var.username
password = var.password
}
node_config {
machine_type = "n1-standard-2"
oauth_scopes = [
"https://www.googleapis.com/auth/devstorage.read_only",
"https://www.googleapis.com/auth/logging.write",
"https://www.googleapis.com/auth/monitoring",
"https://www.googleapis.com/auth/service.management.readonly",
"https://www.googleapis.com/auth/servicecontrol",
"https://www.googleapis.com/auth/trace.append",
"https://www.googleapis.com/auth/compute",
"https://www.googleapis.com/auth/cloud-platform", //needed for sqlservice
"https://www.googleapis.com/auth/sqlservice.admin"
]
}
}
#####################################################################
# Output for K8S
#####################################################################
output "client_certificate" {
value = google_container_cluster.jobrunr-tutorial-kubernetes.master_auth[0].client_certificate
sensitive = true
}
output "client_key" {
value = google_container_cluster.jobrunr-tutorial-kubernetes.master_auth[0].client_key
sensitive = true
}
output "cluster_ca_certificate" {
value = google_container_cluster.jobrunr-tutorial-kubernetes.master_auth[0].cluster_ca_certificate
sensitive = true
}
output "host" {
value = google_container_cluster.jobrunr-tutorial-kubernetes.endpoint
sensitive = true
}
gke/cluster.tf: for the GKE cluster, a machine of type n1-standard-2 is defined, equaling to 2 virtual CPU’s. Various oauth_scopes are given - the important ones are compute, cloud-platform and sqlservice.admin. They are needed to interact with the compute engine for our Kubernetes Cluster and with the Postgres Cloud Sql instance. Some outputs are defined which will be consumed by the Terraform Kubernetes resource.#####################################################################
# GKE Cloud SQL
#####################################################################
resource "google_sql_database_instance" "postgres" {
database_version = "POSTGRES_11"
settings {
tier = "db-g1-small"
database_flags {
name = "max_connections"
value = 100
}
}
timeouts {
delete = "10m"
}
}
resource "google_sql_user" "users" {
name = "jobrunr"
instance = google_sql_database_instance.postgres.name
password = "changeme"
}
resource "google_sql_database" "database" {
name = "jobrunr"
instance = google_sql_database_instance.postgres.name
}
#####################################################################
# Output for K8S
#####################################################################
output "cloudsql_db_name" {
value = google_sql_database.database.name
sensitive = true
}
output "cloudsql_db_user" {
value = google_sql_user.users.name
sensitive = true
}
output "cloudsql_db_password" {
value = google_sql_user.users.password
sensitive = true
}
output "cloudsql_db_instance" {
value = "${var.project}:${var.region}:${google_sql_database_instance.postgres.name}"
sensitive = true
}
gke/cloudsql.tf: a Postgres Cloud Sql instance is defined together with a user and a database. Again various outputs are defined which will be consumed by our k8s module.k8s Module
The k8s module will deploy our docker image we created earlier on and provide it with the environment variables to connect to the Postgres Cloud Sql instance. It will also create a Kubernetes service to expose the application via an Ingress load-balancer to the internet.
We again start with the variables that can be used in the other Terraform files from the k8s module.
#####################################################################
# K8S Variables
#####################################################################
variable "username" {}
variable "password" {}
variable "host" {}
variable client_certificate {}
variable client_key {}
variable cluster_ca_certificate {}

variable cloudsql_instance {}
variable cloudsql_db_name {}
variable cloudsql_db_user {}
variable cloudsql_db_password {}
k8s/variables.tf: the values for these variables are all passed from the main.tf file which acts as a bridge between the gke module and k8s module.#####################################################################
# K8S Provider
#####################################################################
provider "kubernetes" {
host = var.host
username = var.username
password = var.password
client_certificate = base64decode(var.client_certificate)
client_key = base64decode(var.client_key)
cluster_ca_certificate = base64decode(var.cluster_ca_certificate)
}
k8s/k8s.tf: the kubernetes provider allows us to interact with resources supported by Kubernetes.#####################################################################
# K8S Deployment
#####################################################################
resource "kubernetes_deployment" "jobrunr-tutorial" {
metadata {
name = "jobrunr"
labels = {
app = "jobrunr"
}
}
spec {
replicas = 1
selector {
match_labels = {
app = "jobrunr"
}
}
template {
metadata {
labels = {
app = "jobrunr"
}
}
spec {
container {
image = "gcr.io/jobrunr-tutorial-kubernetes/jobrunr-example-paycheck:1.0"
name = "jobrunr"
port {
container_port = 8000
}
port {
container_port = 8080
}
env {
name = "CLOUD_SQL_INSTANCE"
value = var.cloudsql_instance
}
env {
name = "DB_NAME"
value = var.cloudsql_db_name
}
env {
name = "DB_USER"
value = var.cloudsql_db_user
}
env {
name = "DB_PASS"
value = var.cloudsql_db_password
}
resources {
limits {
cpu = "0.5"
memory = "1024Mi"
}
requests {
cpu = "250m"
memory = "512Mi"
}
}
}
}
}
}
}
k8s/deployment.tf: this is the deployment resource where our docker image is provisioned on the Kubernetes cluster. Currently, only 1 replica or instance is requested. The important part is everything under the container attribute - it contains the docker image which the pod should run, the ports that should be exposed and passes all the database credentials using environment variables. On top of that, resource limits and resource requests are defined.#####################################################################
# K8S Service
#####################################################################
resource "kubernetes_service" "jobrunr-tutorial" {
metadata {
name = "jobrunr-tutorial"
}
spec {
selector = {
app = kubernetes_deployment.jobrunr-tutorial.spec.0.template.0.metadata[0].labels.app
}
port {
name = "dashboard"
port = 8000
target_port = 8000
}
port {
name = "rest-api"
port = 8080
target_port = 8080
}
type = "LoadBalancer"
}
}
k8s/service.tf: the final piece of the puzzle - the Kubernetes Service makes sure that both the Dashboard and the Rest API are available on the internetDeploy time!
We now can use Terraform commands to provision our application to the Google Cloud Platform. Make sure you are in the directory which contains the main.tf file and the gke and k8s folders when issuing the following commands:
~/jobrunr/gcloud$ terraform init
~/jobrunr/gcloud$ terraform plan
~/jobrunr/gcloud$ terraform apply
After you run the terraform apply command you have to wait… typical deploy time is about 5 minutes.
After the deployment succeeds, we can query kubernetes to find out the public ip-address.
~/jobrunr/gcloud$ gcloud container clusters get-credentials jobrunr-tutorial-kubernetes --region europe-west1
~/jobrunr/gcloud$ kubectl get services
~/jobrunr/gcloud$ kubectl get pods
Testing time!
Since the salary slip microservice is now available on the internet, we can test it. First, we will create 10.000 employees in our database. To do so, fire up your favorite browser and go to the url http://${public-ip-from-the-service}:8080/create-employees?amount=10000. This takes about 15 seconds.
Now, visit the JobRunr dashboard - you can find it at http://${public-ip-from-the-service}:8000/dashboard. Navigate to the Recurring jobs tab and trigger the ‘Generate and send salary slip to all employees’ job. After about 15 seconds, you should have 10.000 enqueued jobs.
Scale it up!
Now, let’s add 10 instances of our application to the cluster by changing the replica attribute in the deployment.tf file.#####################################################################
# K8S Deployment
#####################################################################
resource "kubernetes_deployment" "jobrunr-tutorial" {
metadata {
...
}
spec {
replicas = 10
...
}
}
k8s/deployment.tf: the replica value is changed from 1 to 10 in the Kubernetes deployment resource
We now apply this change again using the Terraform apply command:
~/jobrunr/gcloud$ terraform apply
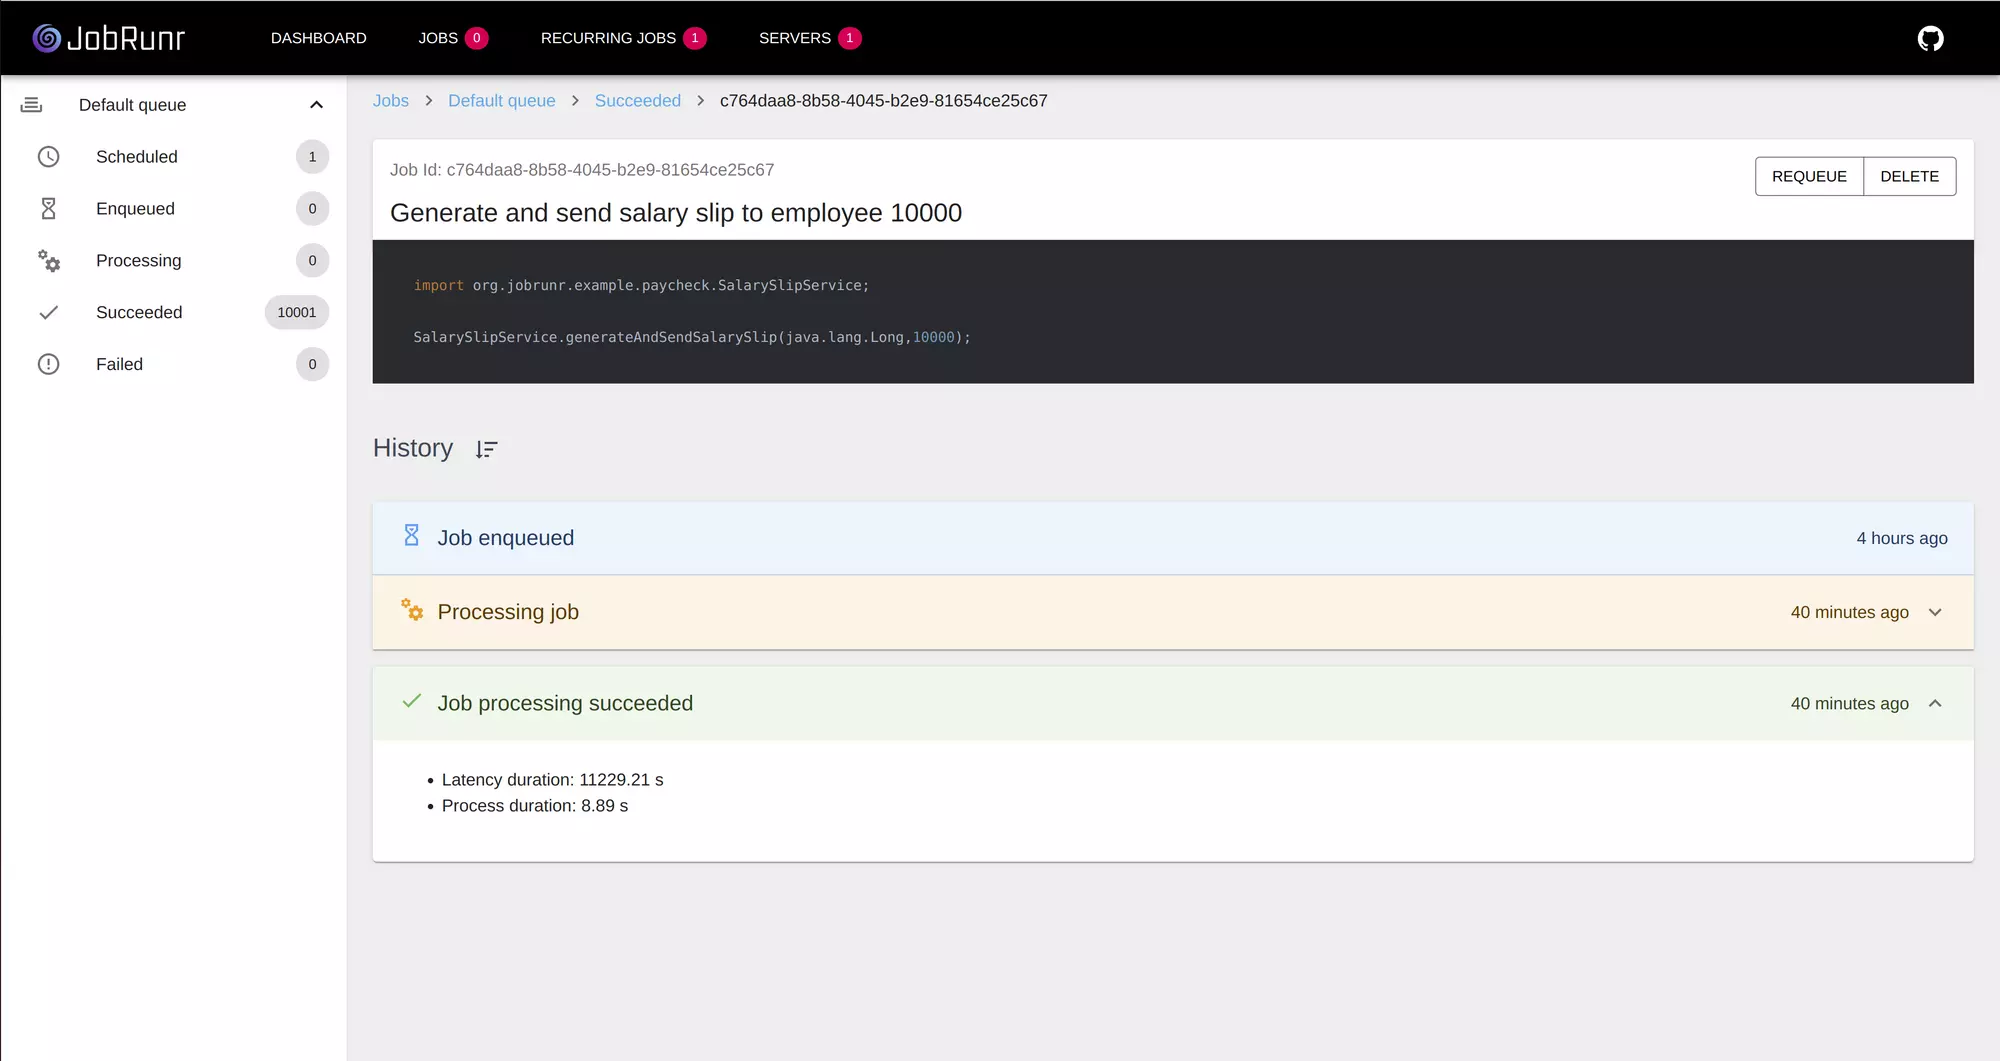
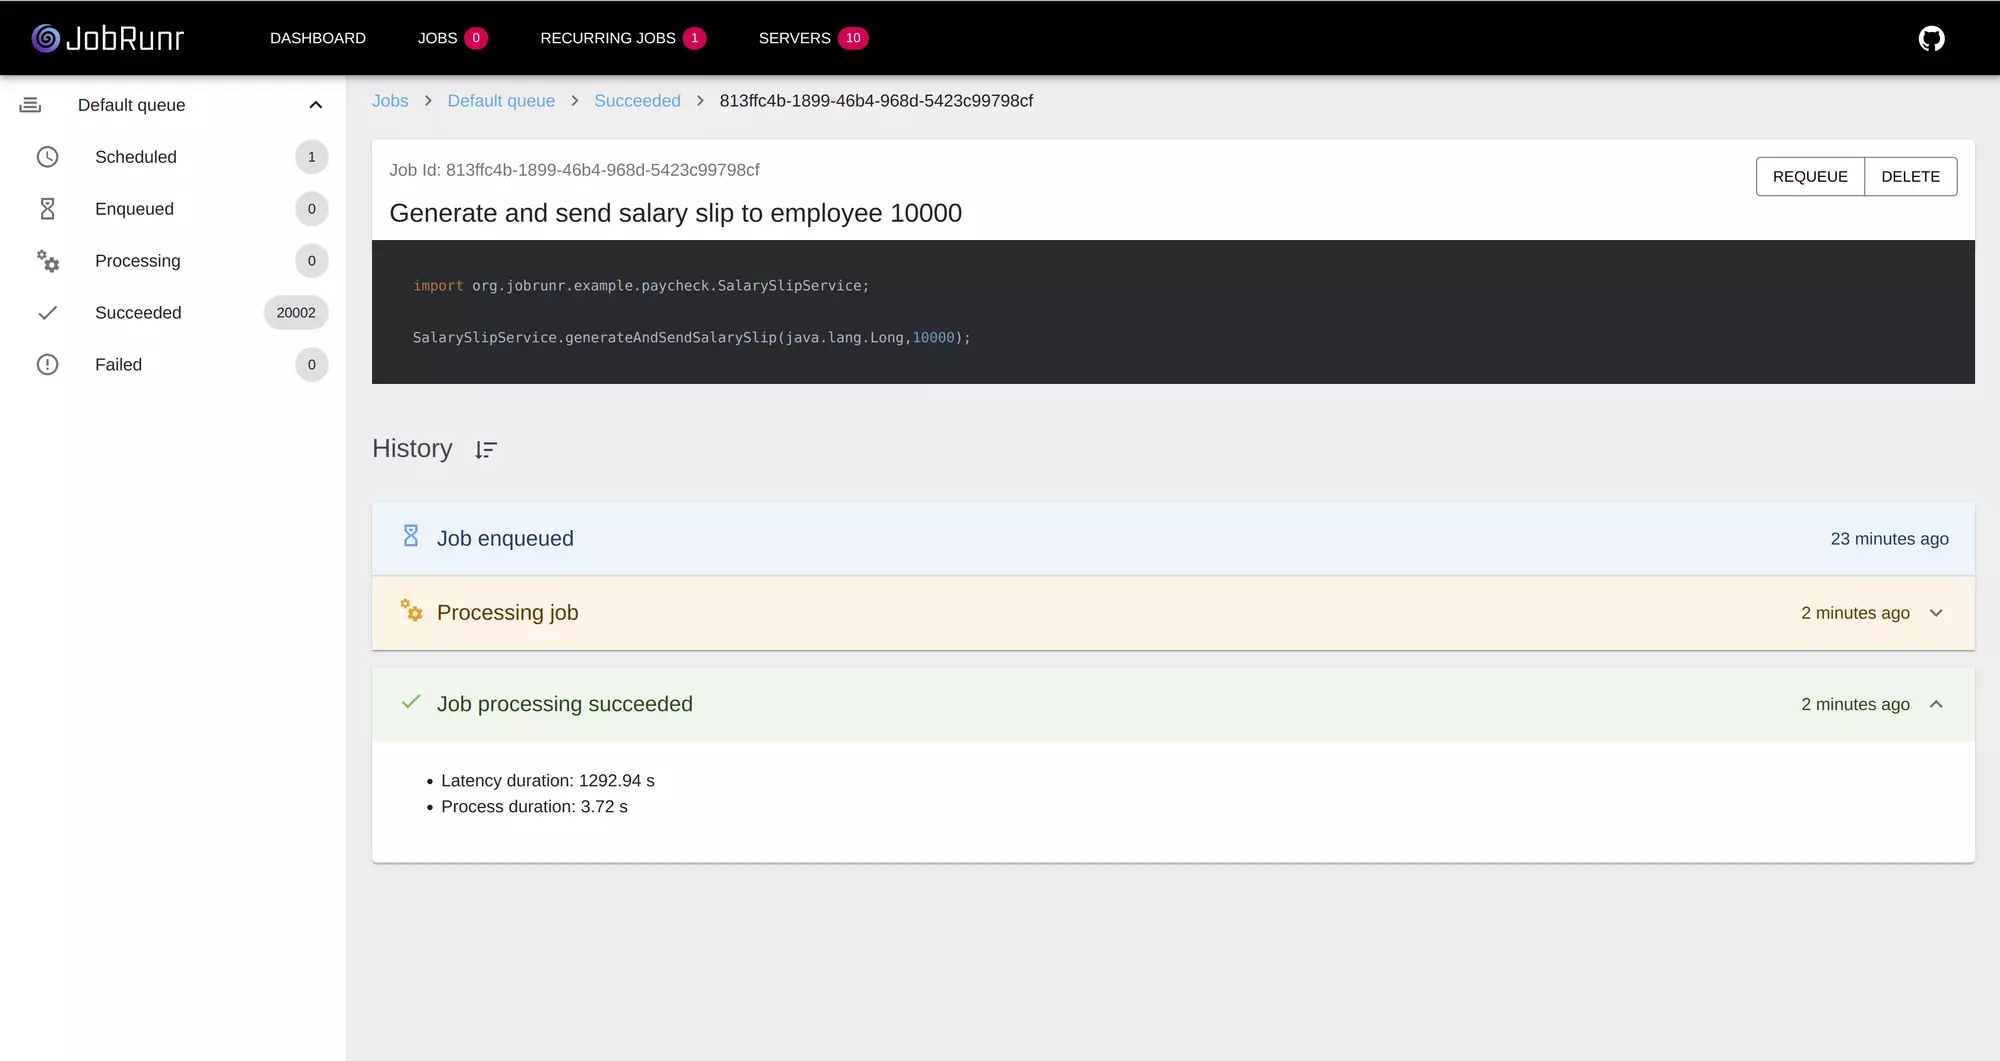
If you run the command ~/jobrunr/gcloud$ kubectl get pods you will now see 10 pods running our JobRunr application. Let’s trigger the ‘Generate and send salary slip to all employees’ recurring job again and wait for it to finish.
To keep your free credit for GCP, do not forget to issue the command terraform destroy. It will stop all pods, remove the Kubernetes cluster and delete the Postgres Cloud Sql instance.
Conclusion
JobRunr can easily scale horizontally and allows to distribute all long-running background jobs over multiple instances without any change to the Java code. In an ideal world, we would have seen a 900% speed increase instead of the 869% we see now as we added 9 extra pods. As JobRunr only performs each job only once, there is some overhead when pulling jobs from the queue explaining the difference.
Learn more
I hope you enjoyed this tutorial and you can see the benefits of JobRunr, Terraform and Kubernetes - it allows to easily scale horizontally and distribute all long-running background jobs over multiple instances without any change to the Java code.
To learn more, check out these guides:
- JobRunr - Java batch processing made easy…
- Terraform - Provision servers in the cloud with Terraform
- Kubernetes - Getting started with Kubernetes
- Jib - Create fast and easy docker images with Jib
If you liked this tutorial, feel free to star us on GitHub!